Understanding App_Resources
The App_Resources folder contains platform-specific resources of the application (icons, configuration files, native code, etc.). An application that supports both Android and iOS would therefore contain a subfolder for each platform.
This page serves as a quick reference to understand how most settings in App_Resources affect behavior and the the look of a NativeScript app.
Quick Links:
Android
On Android, many aspects of the default styling is controlled through various settings within the App_Resources folder.
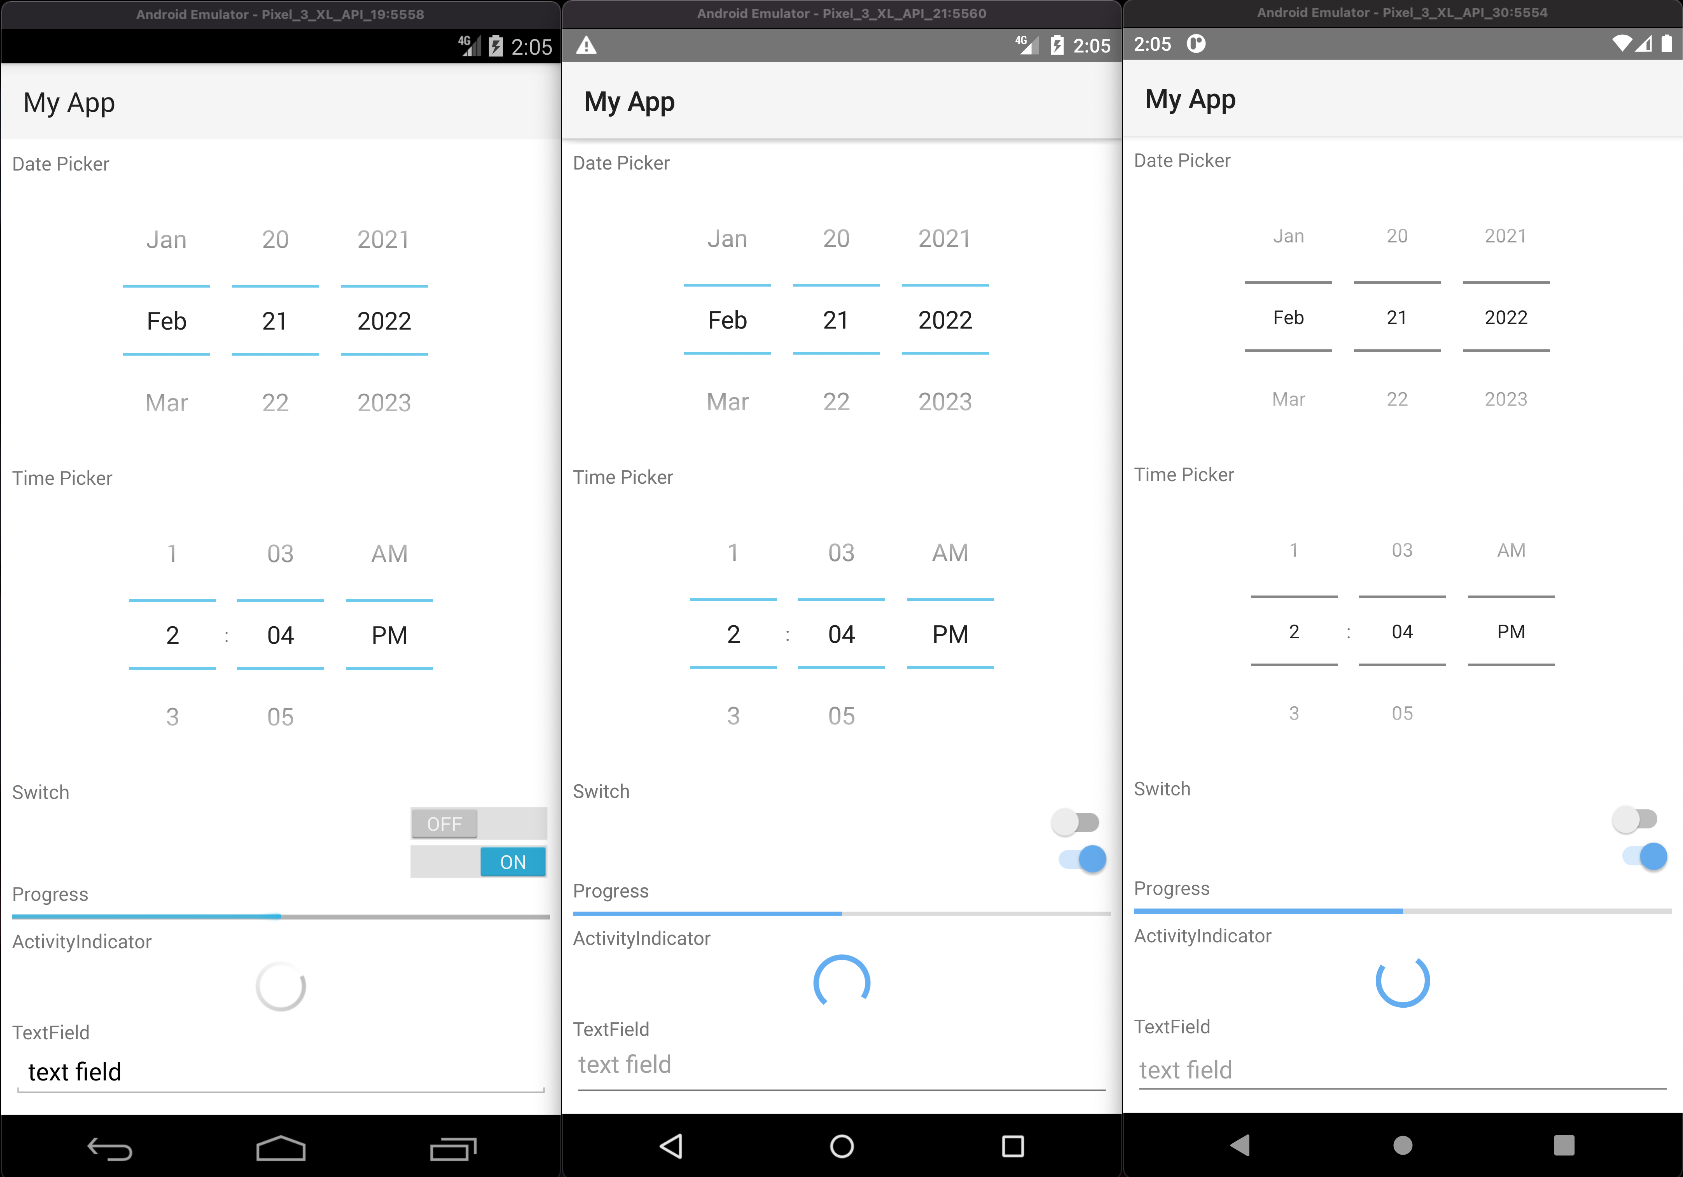
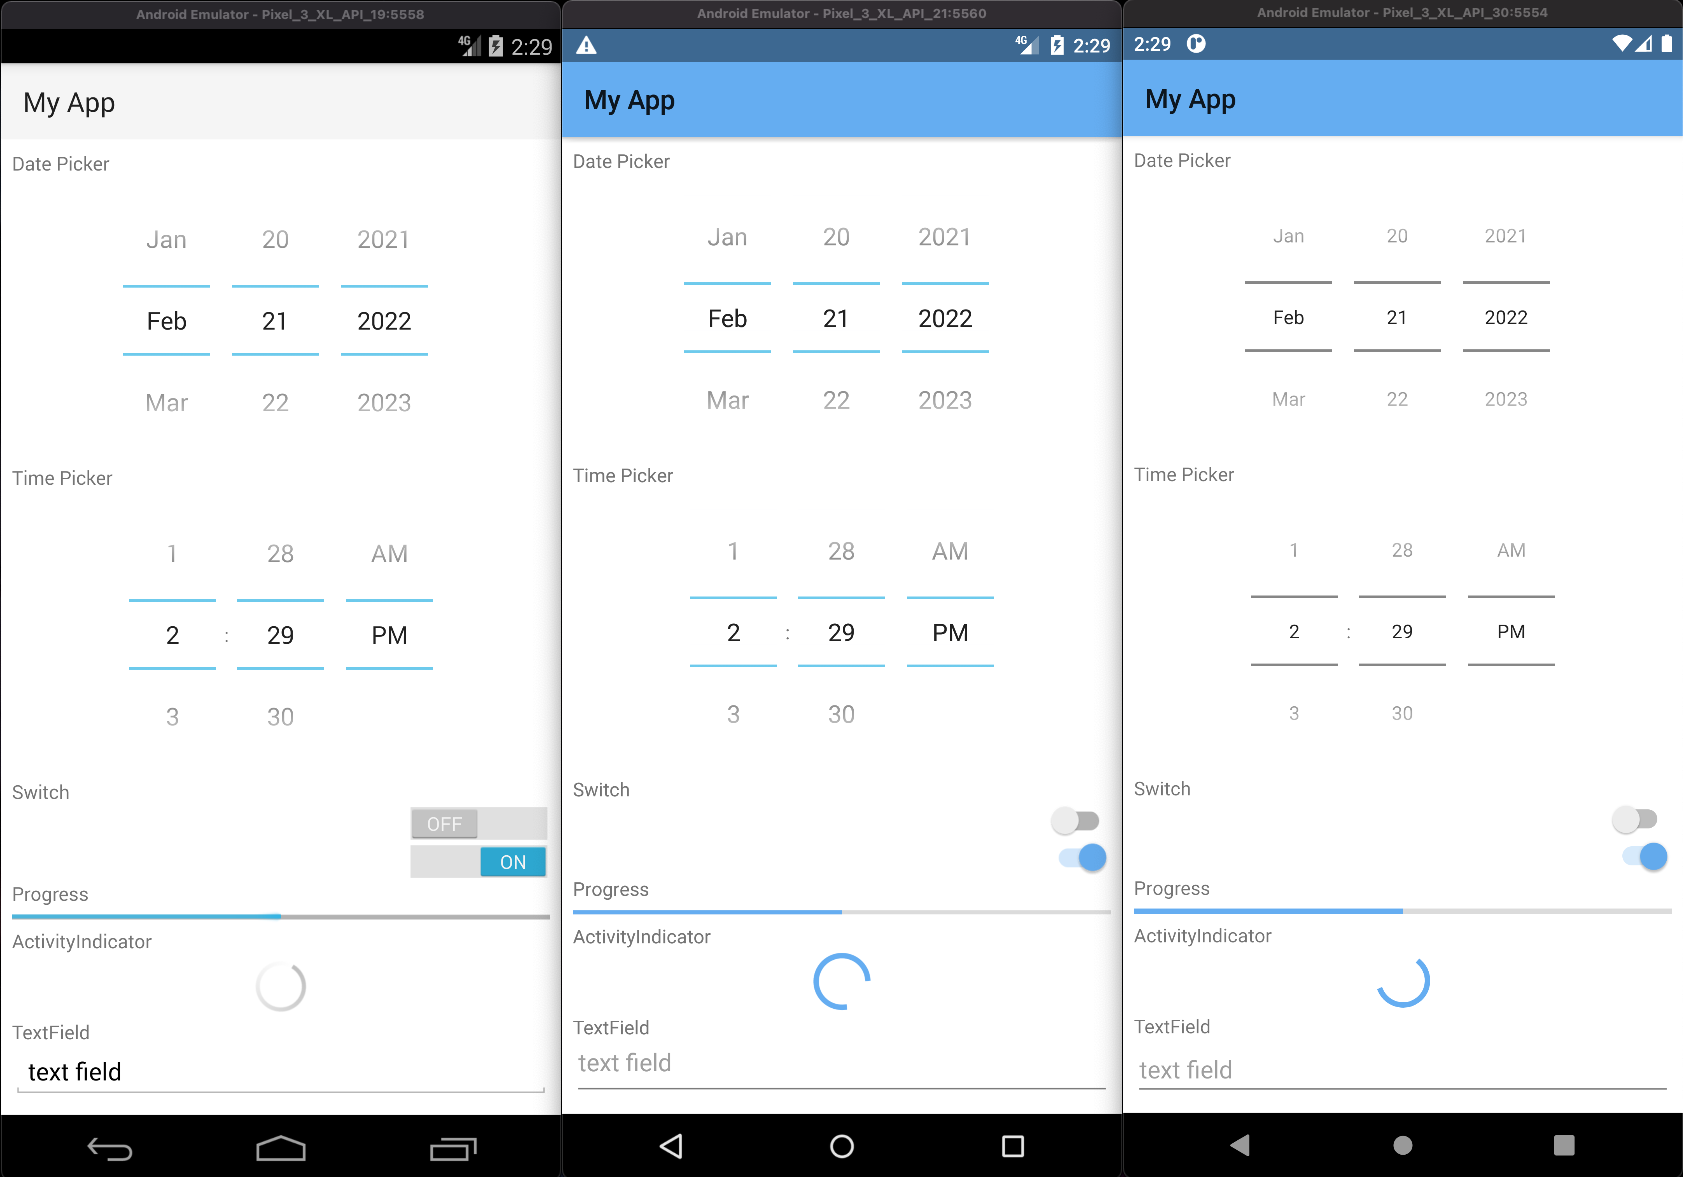
Here we are showing the default look of a few elements (no custom styling applied) using the default values provided in App_Resources:
App_Resources/
├─ Android/
│  └─ src/main/res/
│     ├─ values/      # Default Values
│     ├─ values-v21/  # Values for API 21+
│     └─ values-v29/  # Values for API 29+
└─ ... more
Values can be overridden on specific API levels by making the changes in the corresponding directories.
Adding native code to an application
There are different ways to add native code to an Android application. You can add Java JAR files or Java and/or Kotlin source files in App_Resources/Android/libs and App_Resources/Android/src respectively, e.g.:
App_Resources/
├─ Android/
│  ├─ app.gradle
│  ├─ libs/
│  │  ├─ HelloAndroidLib.aar  # Android ARchive
│  │  └─ HelloJavaLib.jar     # Java ARchive
│  └─ src/
│     └─ main/
│       ├─ java/
│       │  ├─ com/example/HelloKotlin.kt  # Kotlin source code
│       │  └─ com/example/HelloJava.java  # Java source code
│       └─ res/
└─ ... more
// HelloKotlin.kt
package com.example

class HelloKotlin {
  val hello = "Hello from Kotlin!"
}
// HelloJava.java
package com.example

public class HelloJava {
  public String getString() {
    return "Hello from Java!";
  }
}
Given the example above, your JavaScript or TypeScript code can reference the Kotlin or Java code by using the full class names, e.g.
const helloKotlin = new com.example.HelloKotlin()
console.log('Kotlin says: ' + helloKotlin.hello)
// prints: Kotlin says: Hello from Kotlin!

const helloJava = new com.example.HelloJava()
console.log('Java says: ' + helloJava.getString())
// prints: Java says: Hello from Java!
Note
If using TypeScript, you may need to generate typings, or alternatively declare the top level package name as any, e.g.
declare const com: any
If using Kotlin source files, useKotlin should be enabled in before-plugins.gradle or app.gradle
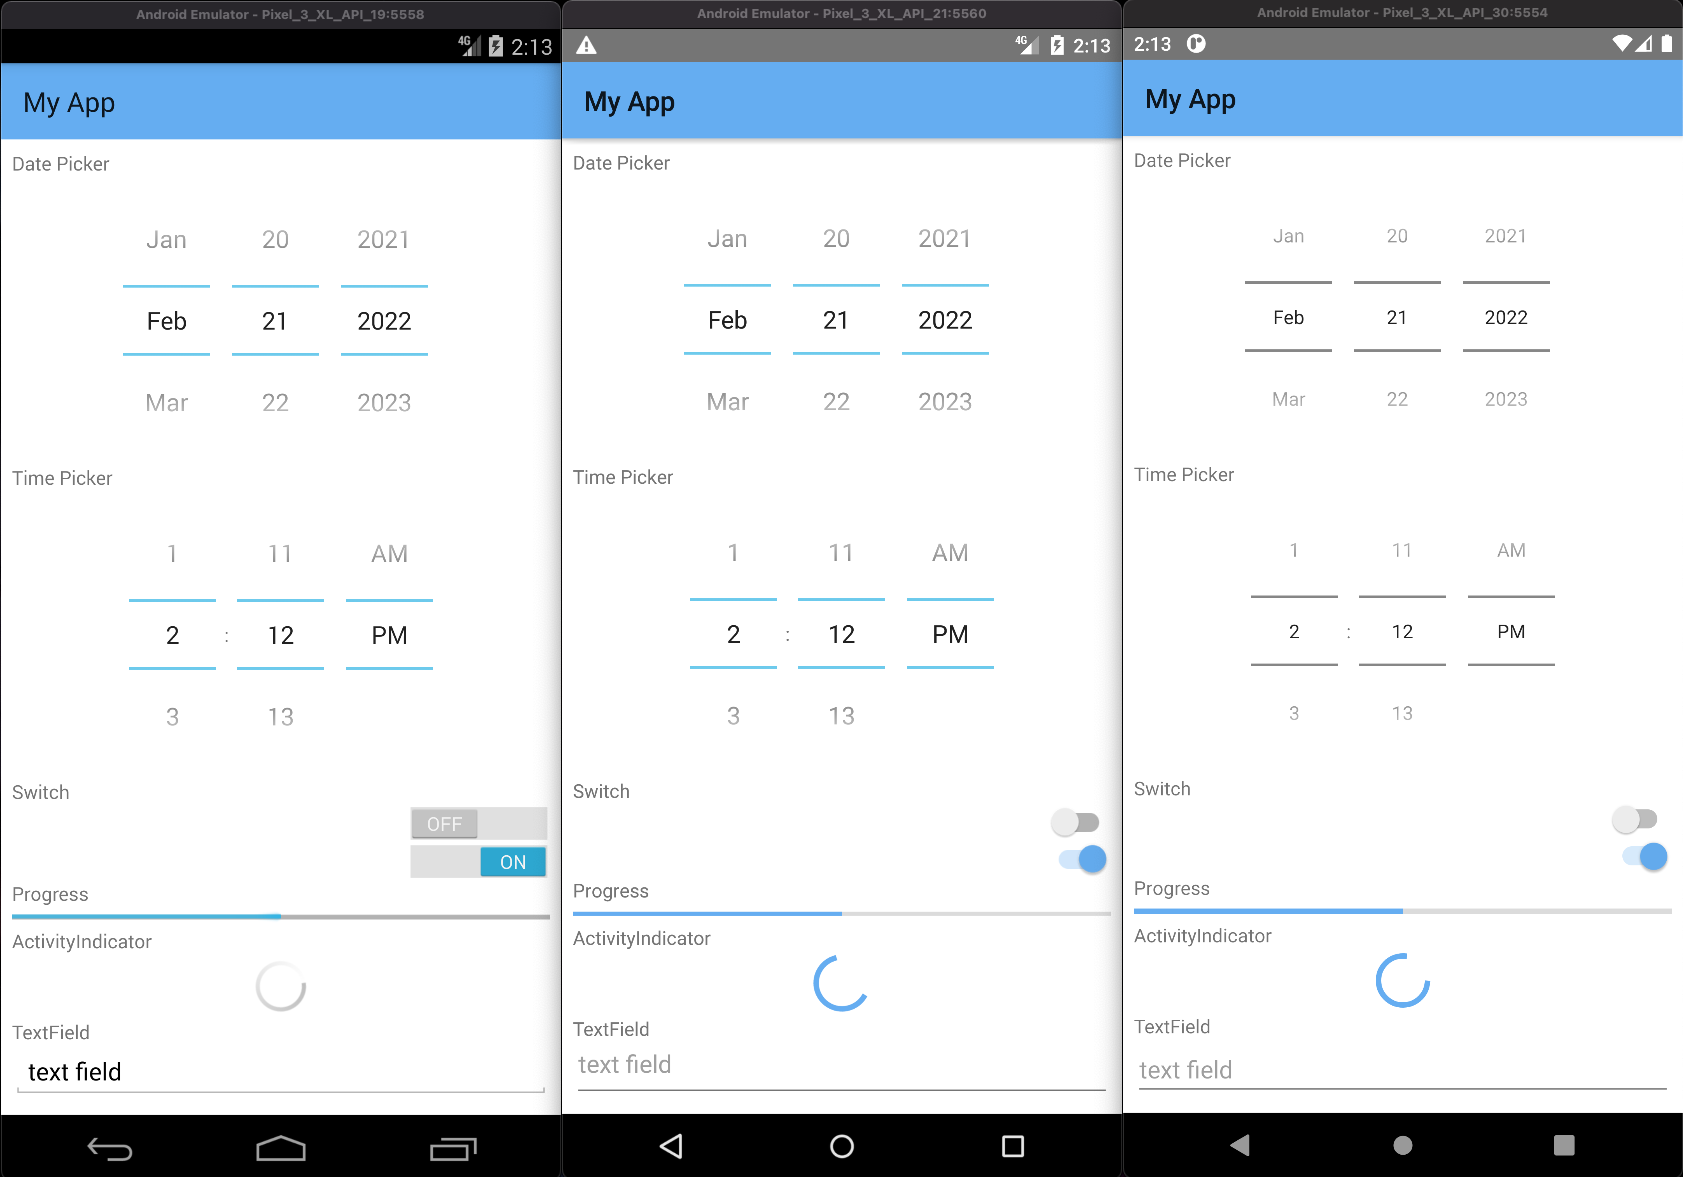
Setting the default color of the ActionBar
To change the default color fo the ActionBar, edit the ns_primary color inside App_Resources/Android/src/main/res/values/colors.xml:
<!-- The default color of the ActionBar -->
<color name="ns_primary">#65adf1</color>
Setting the default color of the status bar
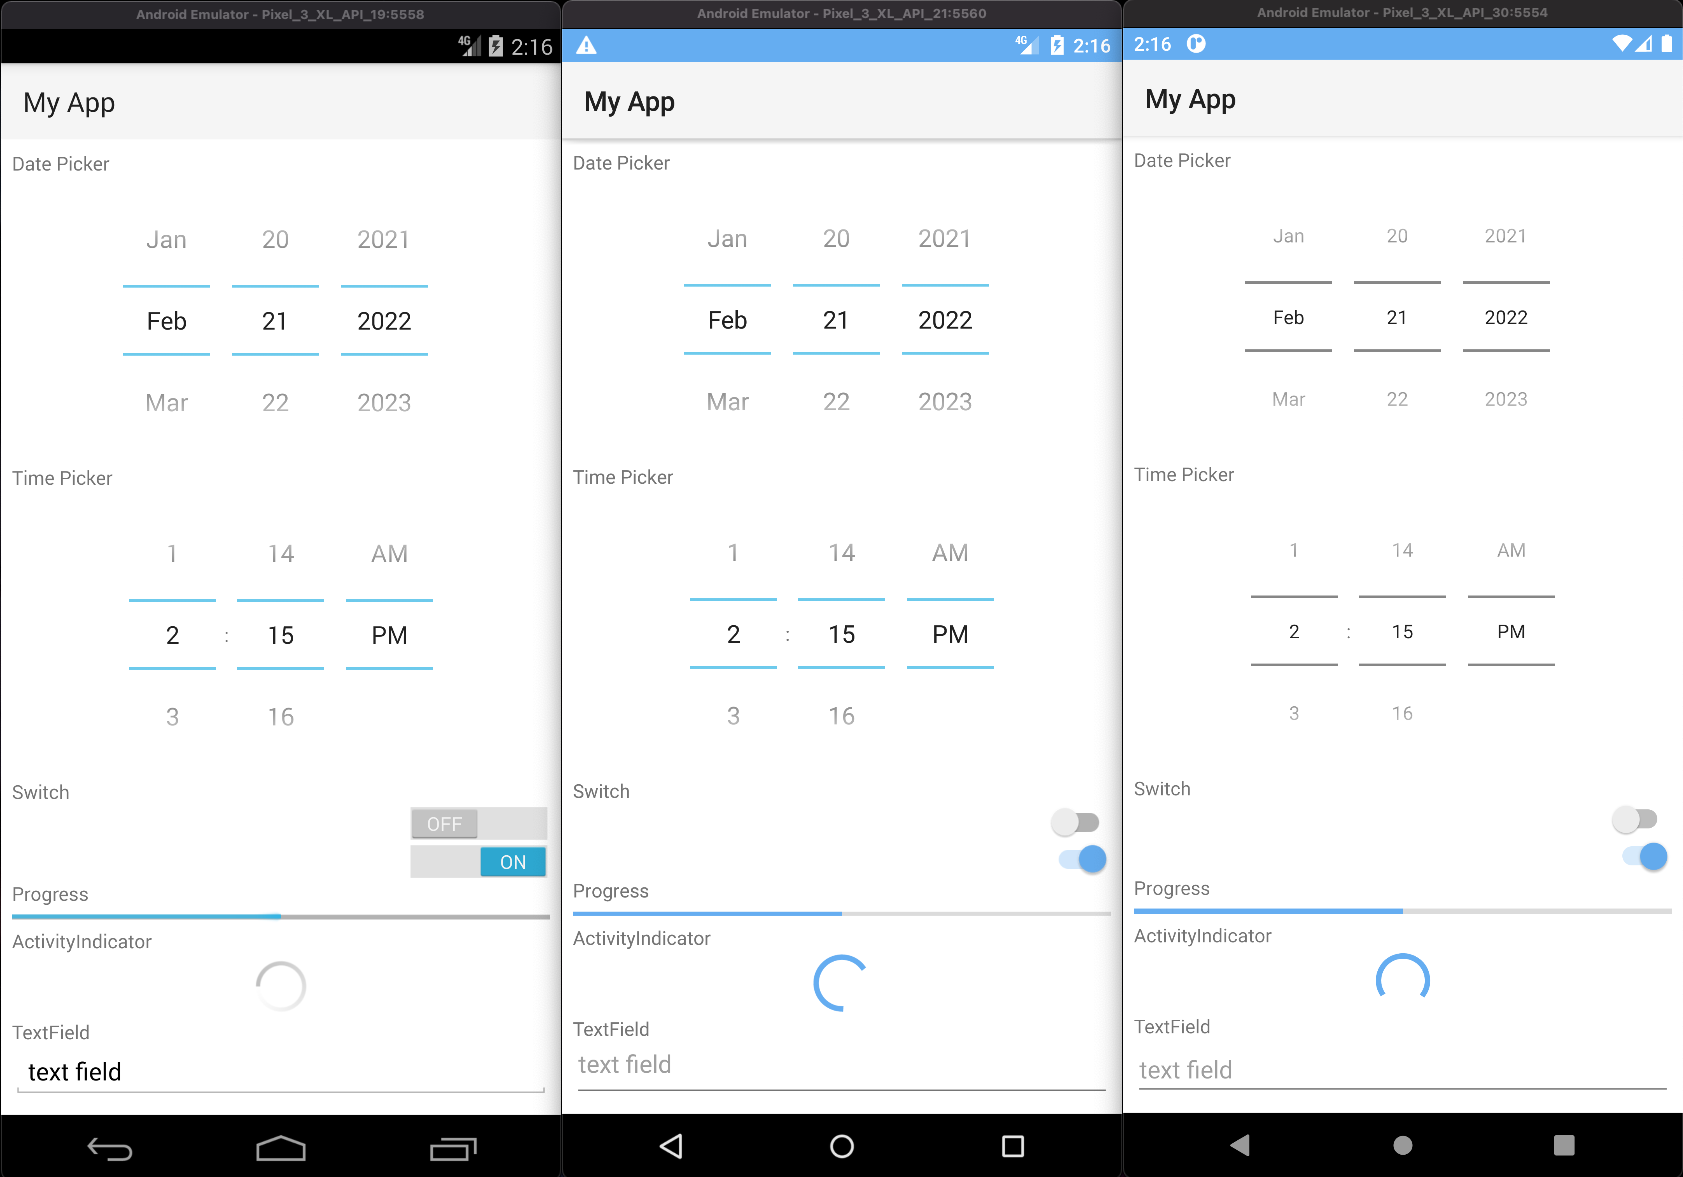
To change the default color of the status bar, edit the ns_primaryDark color inside App_Resources/Android/src/main/res/values/colors.xml:
Note
The color will be applied on API21+ since lower API levels do not support custom status bar colors*.
<!-- (API21+) The color of the status bar and contextual app bars; this is normally a dark version of colorPrimary. -->
<color name="ns_primaryDark">#65adf1</color>
Setting the accent color
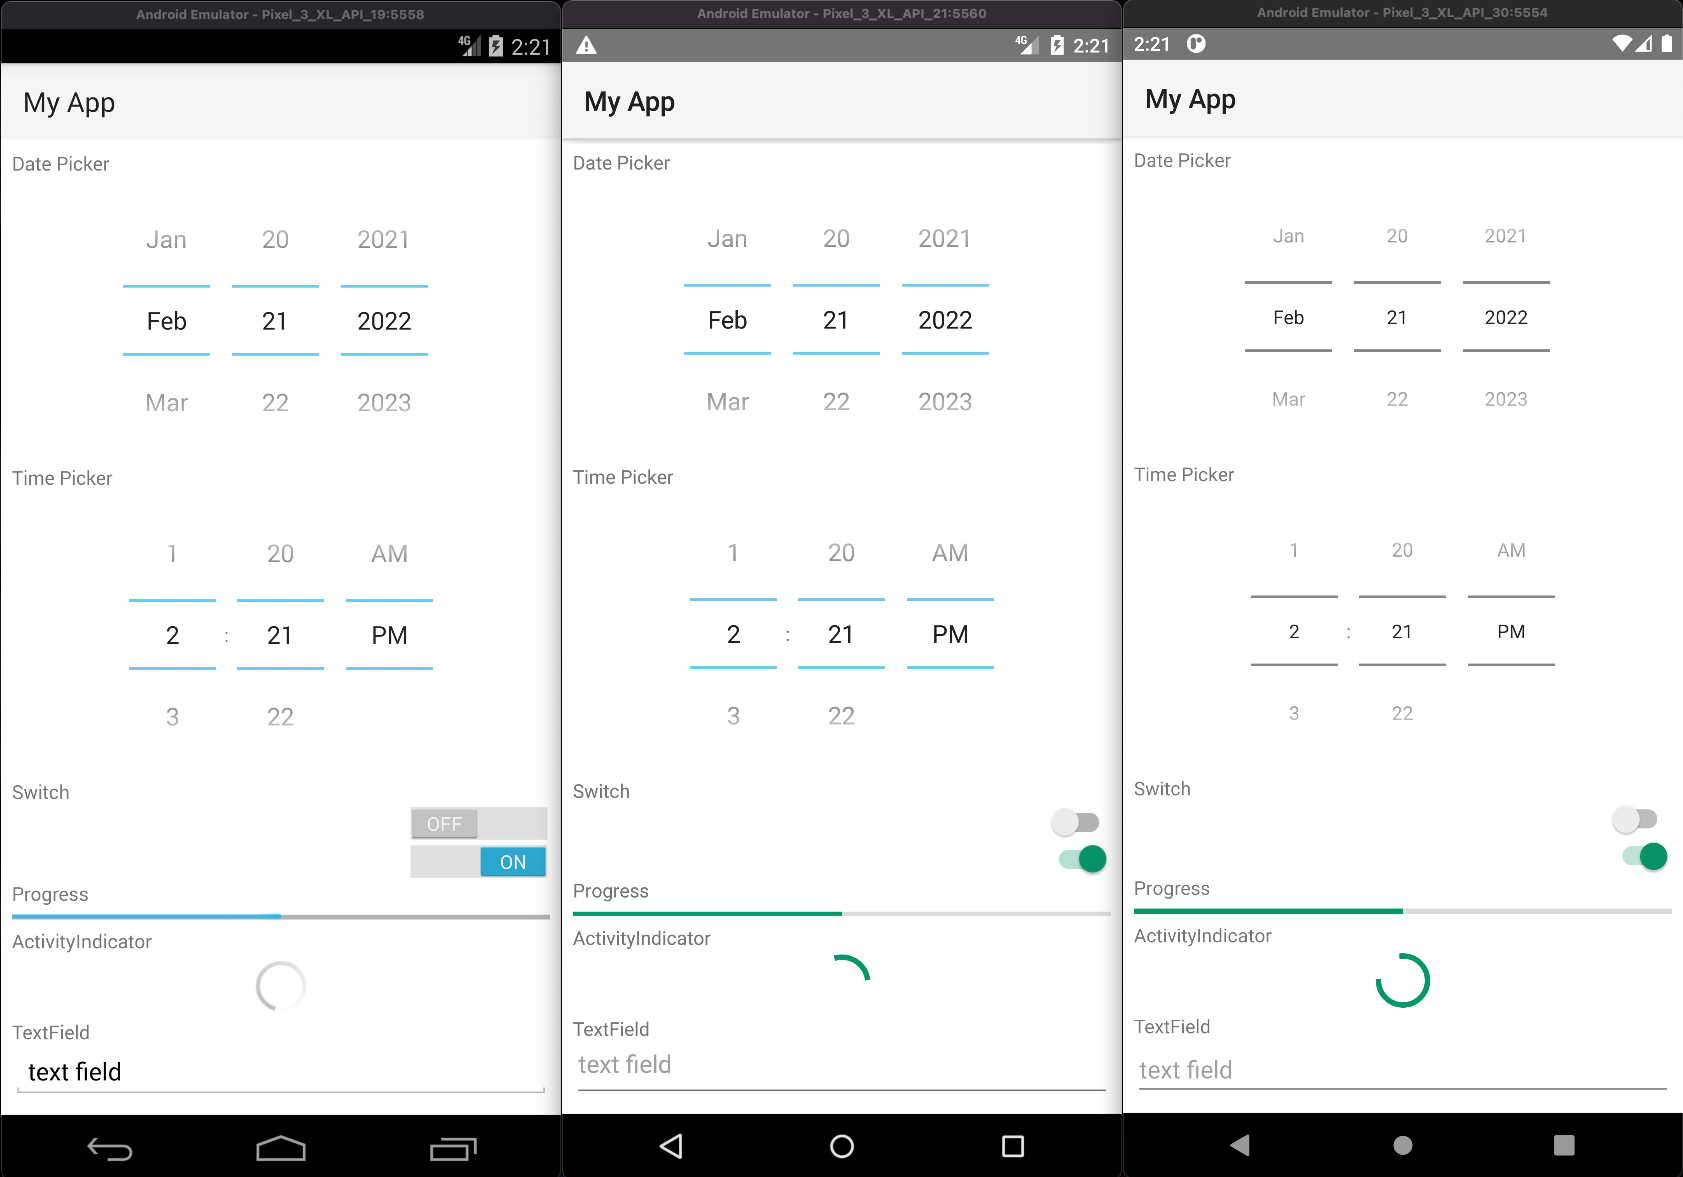
Various native elements have an accent color, which can be changed by setting the ns_accent color inside App_Resources/Android/src/main/res/values/colors.xml:
Note
The color will be applied on API21+ since lower API levels do not support custom accent colors.
<!-- The color of UI controls such as check boxes, radio buttons, and edit text boxes. -->
<color name="ns_accent">#059669</color>
Showing the app under the status bar
The status bar can be made translucent and let the app flow underneath by uncommenting android:windowTranslucentStatus in AppThemeBase21 and android:paddingTop in NativeScriptToolBarStyle in App_Resources/Android/src/main/res/values-v21/styles.xml:
Note
We have added <color name="ns_primary">#65ADF1</color> to App_Resources/Android/src/main/res/values-v21/colors.xml to color the ActionBar.
<!-- Application theme -->
<style name="AppThemeBase21" parent="AppThemeBase">
  <!-- Uncomment this to make the app show underneath the status bar -->
  <item name="android:windowTranslucentStatus">true</item>
<!-- ... -->
</style>

<!-- ... -->

<style name="NativeScriptToolbarStyle" parent="NativeScriptToolbarStyleBase">
  <item name="android:elevation">4dp</item>

  <!-- Add padding to the ActionBar - useful when android:windowTranslucentStatus is set to true -->
  <item name="android:paddingTop">24dp</item>
</style>
Changing the DatePicker to calendar mode
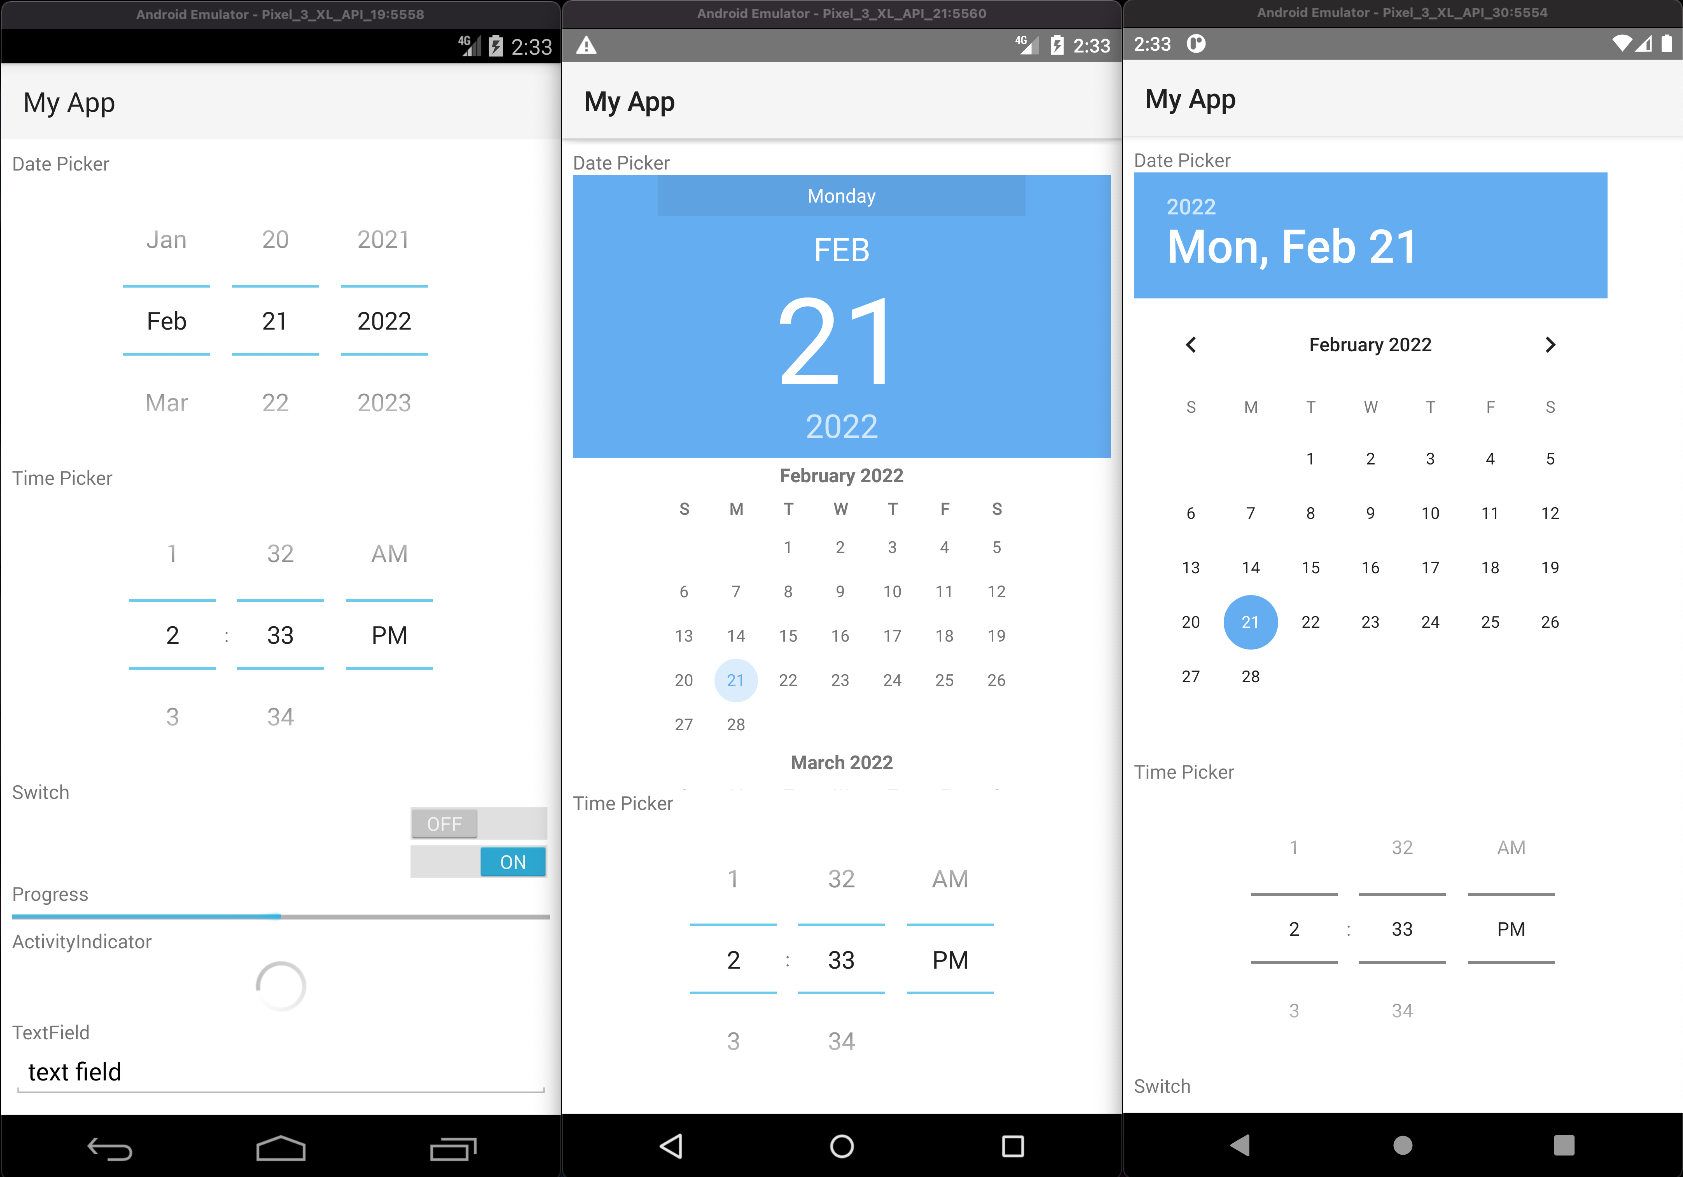
To change the mode of the DatePicker from the default spinner style, change android:datePickerMode in App_Resources/Android/src/main/res/values-v21/styles.xml:
<!-- Default style for DatePicker - in spinner mode -->
<style name="SpinnerDatePicker" parent="android:Widget.Material.Light.DatePicker">
  <!-- set the default mode for the date picker (supported values: spinner, calendar)  -->
  <item name="android:datePickerMode">calendar</item>
</style>
Changing the TimePicker to clock mode
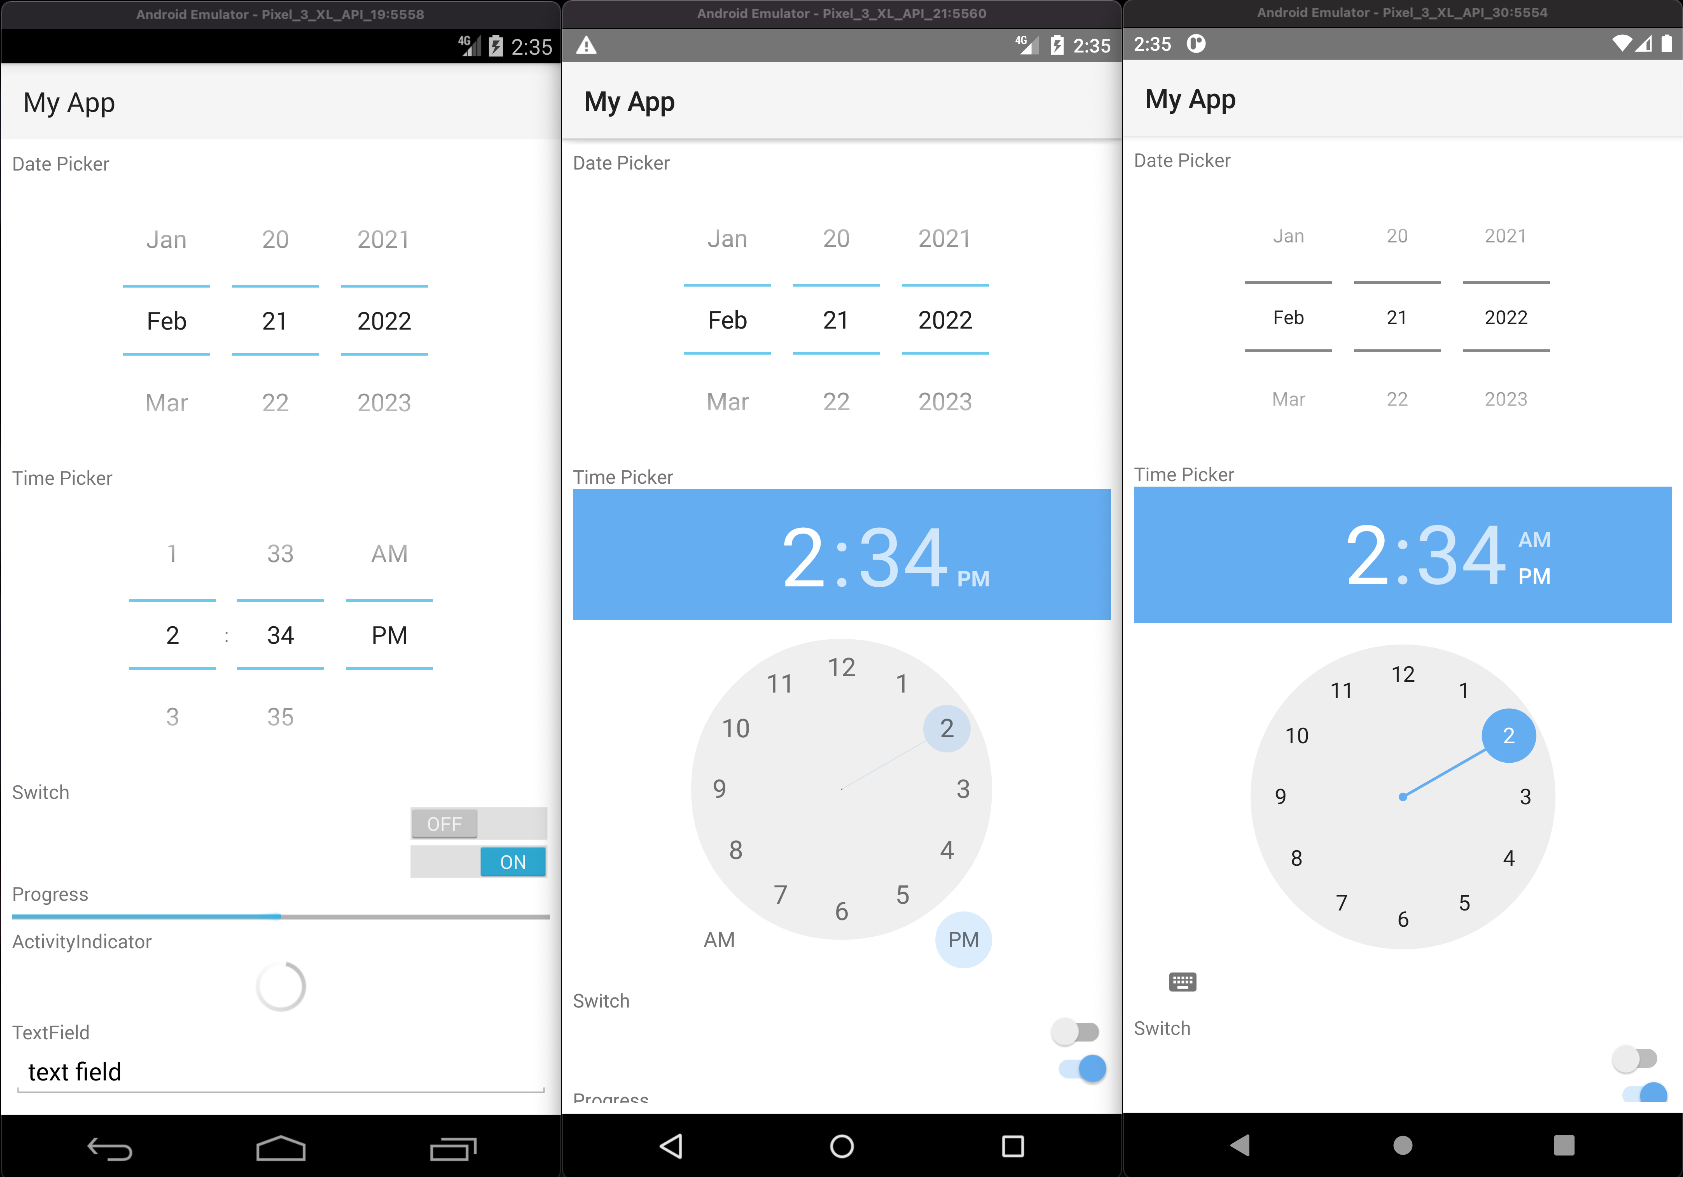
To change the mode of the TimePicker from the default spinner style, change android:datePickerMode in App_Resources/Android/src/main/res/values-v21/styles.xml:
<!-- Default style for TimePicker - in spinner mode -->
<style name="SpinnerTimePicker" parent="android:Widget.Material.Light.TimePicker">
  <!-- set the default mode for the time picker (supported values: spinner, clock)  -->
  <item name="android:timePickerMode">clock</item>
</style>
Enabling force Dark Mode
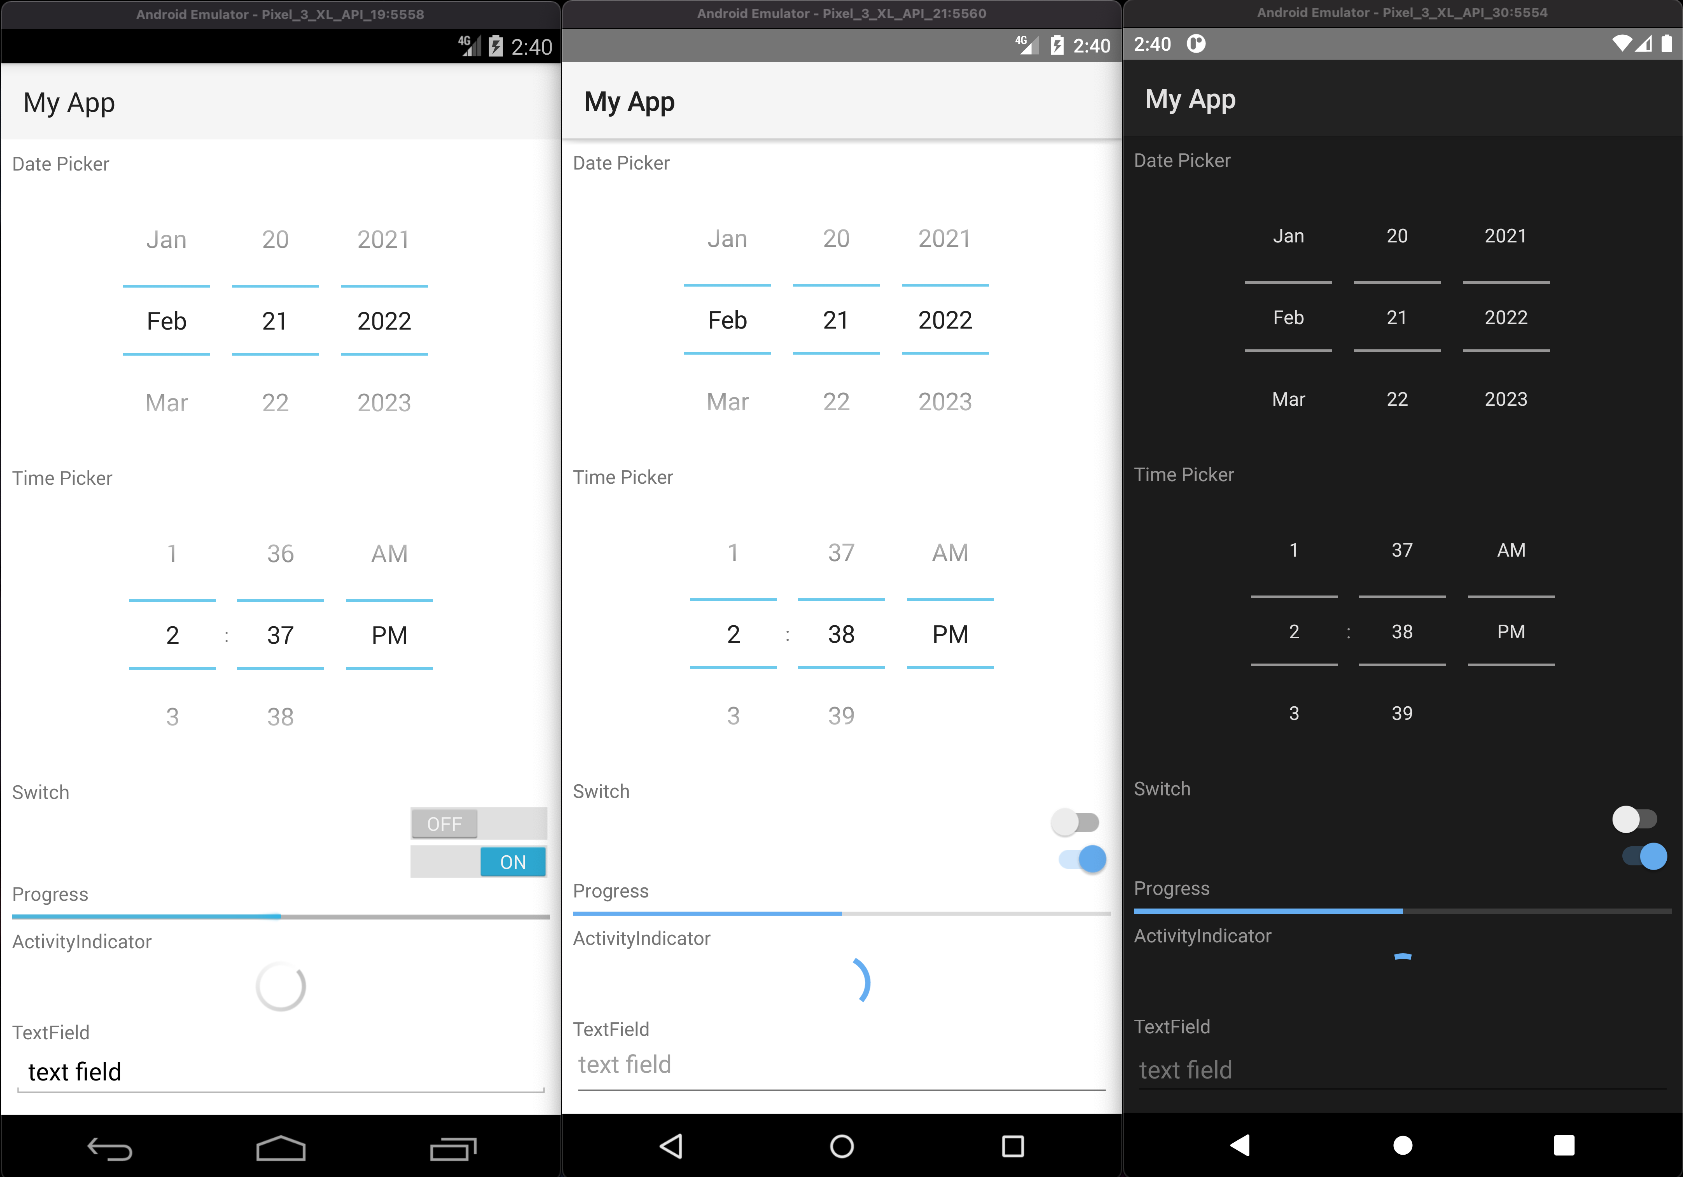
On API29+ apps can opt-in to a default Dark Mode when the system is set to use Dark Mode. This is disabled by default as it can lead to visual issues, since the automatic conversion may not display correctly in all cases.
To opt-in, change the android:forceDarkAllowed value to true in App_Resources/Android/src/main/res/values-v29/styles.xml:
<!--
  Disable forced dark mode on newer devices.
  Enabling this will make your app appear in dark-mode,
  but the way the app is converted may lead to visual issues
-->
<item name="android:forceDarkAllowed">true</item>
Note
If you enable android:forceDarkAllowed make sure you check if all the screens of you app look correct in the forced Dark Mode.
iOS
Most things on iOS are controlled directly through the app's template code.